


This article describes how to use Softaculous and cPanel to stage a website.
About website staging
It is important to test a site's code and content before you publish it and make it available to the public. The easiest way to do this is by using a website staging environment. With just a few quick steps, Softaculous enables you to easily configure a testing environment for your site.
Will staging work on every site?
Softaculous staging is not a catchall solution for every site. Unfortunately, staging will not work with some licensing and plugins.
Magento prevents the staging capability from functioning. If you’re using Magento, we recommend not using the Softaculous staging feature.
Setting up the staging environment
In order to create a staging environment in Softaculous, you must first create either a subdomain or addon domain to conduct staging on. You can host the staging environment in your current web space on cPanel with either option:
- Create a Subdomain: The first option for creating an area for staging is to create a subdomain for your site in cPanel for the sole purpose of staging. For example, if your primary domain is example.com, you could create a staging.example.com subdomain to use as the testing environment.
- Create an Addon Domain: The second option for creating an area for staging is to create an addon domain for your site. Note that this option does require registering the addon domain.
Backing up your site
It is absolutely critical that you’ve previously backed up your site before staging. While Softaculous does offer automatic backups of the site, it is inherently risky to trust one application with all of your site’s data. cPanel backups are easy to create and quick.
Staging the site
The following procedure uses WordPress for the sample installation. A staging copy of the WordPress installation is created in a subdirectory named staging. To do this, follow these steps:
- Log in to cPanel.
- In the SOFTACULOUS APPS INSTALLER section of the cPanel home screen, click Softaculous Apps Installer. The Softaculous installer page appears.
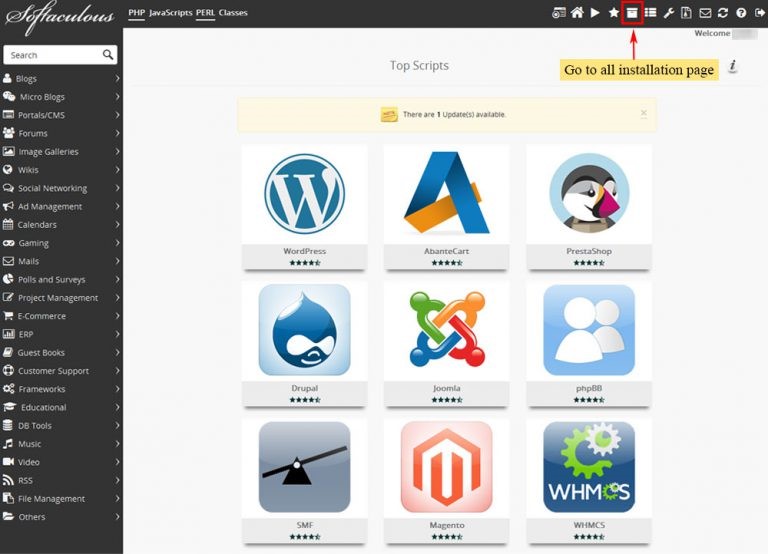
- Click on the All Installations page, which can be seen in the screenshot below:

- Choose the installation (such as WordPress) that needs the staging site. If your installation is not visible in Softaculous, you can import it.
- Click the Create Staging con for the selected installation:
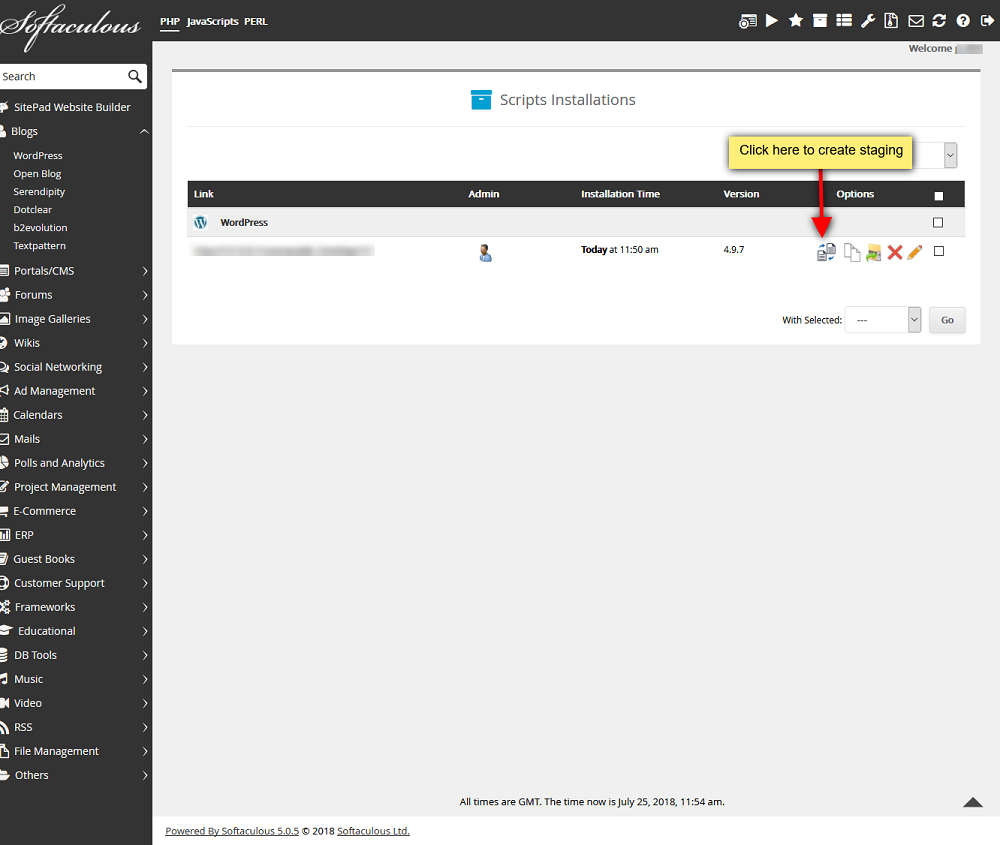
- The Create Staging page appears with both the live installation details and a form requiring details about the staging copy you want to create. Complete the staging installation details, such as Choose Protocol, Choose Domain (this would be the staging subdomain you’ve previously created in step one,) the In Directory, and the Database Name:
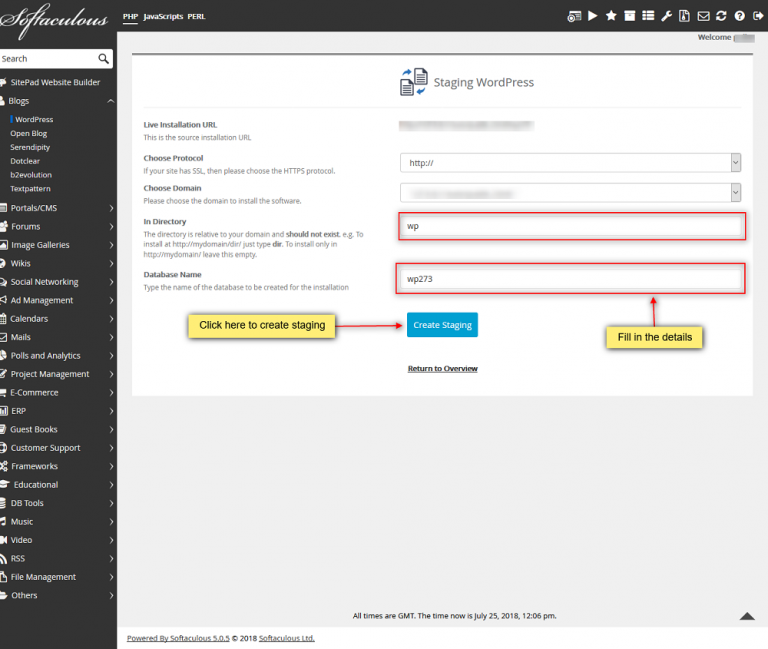
- Click Create Staging. The time taken varies in accordance with the size of your installation, so please be patient. The staging copy will soon be ready. You will use the same credentials you normally would for the application in the live installation.
- You can now use this staging installation to test updates, develop a new version of the site, or any other changes you may want to test before pushing changes to the live site.
Pushing a staged site live
When you push a staged site live, Softaculous creates a backup of the existing live site first. Please remember that it is best not to depend solely on one application to back up your site, and to have alternate backups in case something goes awry.
The following procedure uses WordPress for the sample installation:
- Log in to cPanel.
- In the SOFTACULOUS APPS INSTALLER section of the cPanel home screen, click Softaculous Apps Installer. The Softaculous installer page appears.
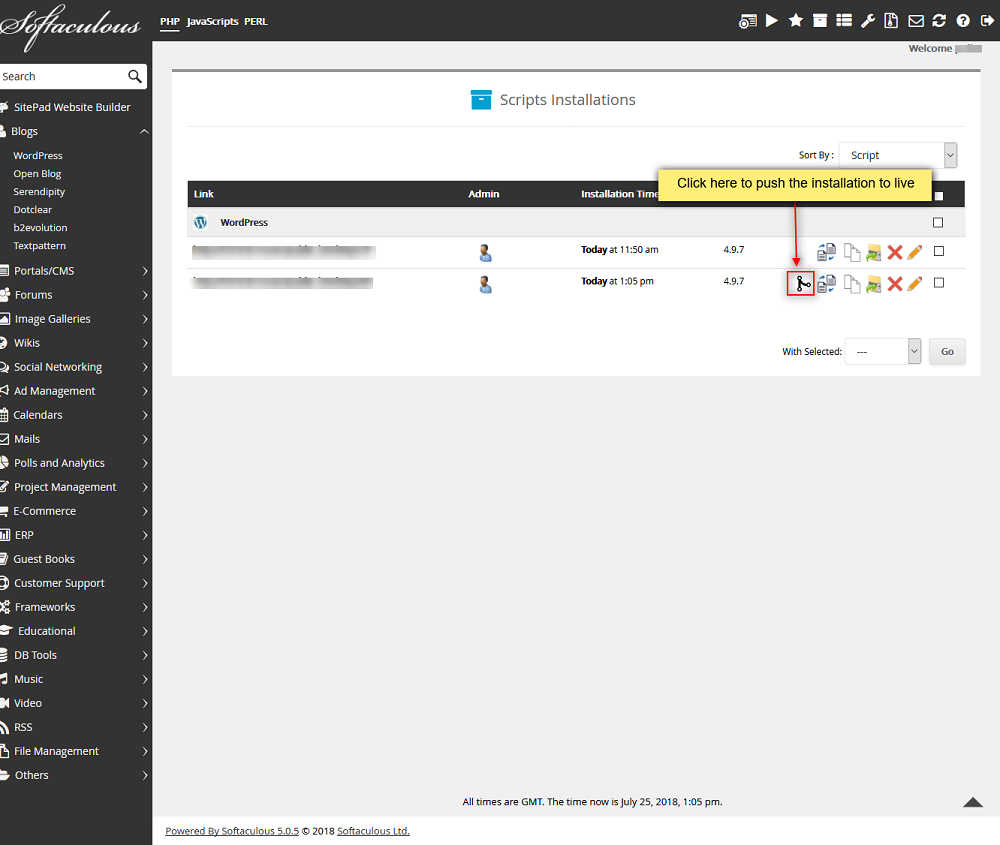
- Click on the All Installations page, which can be seen in the screenshot below:
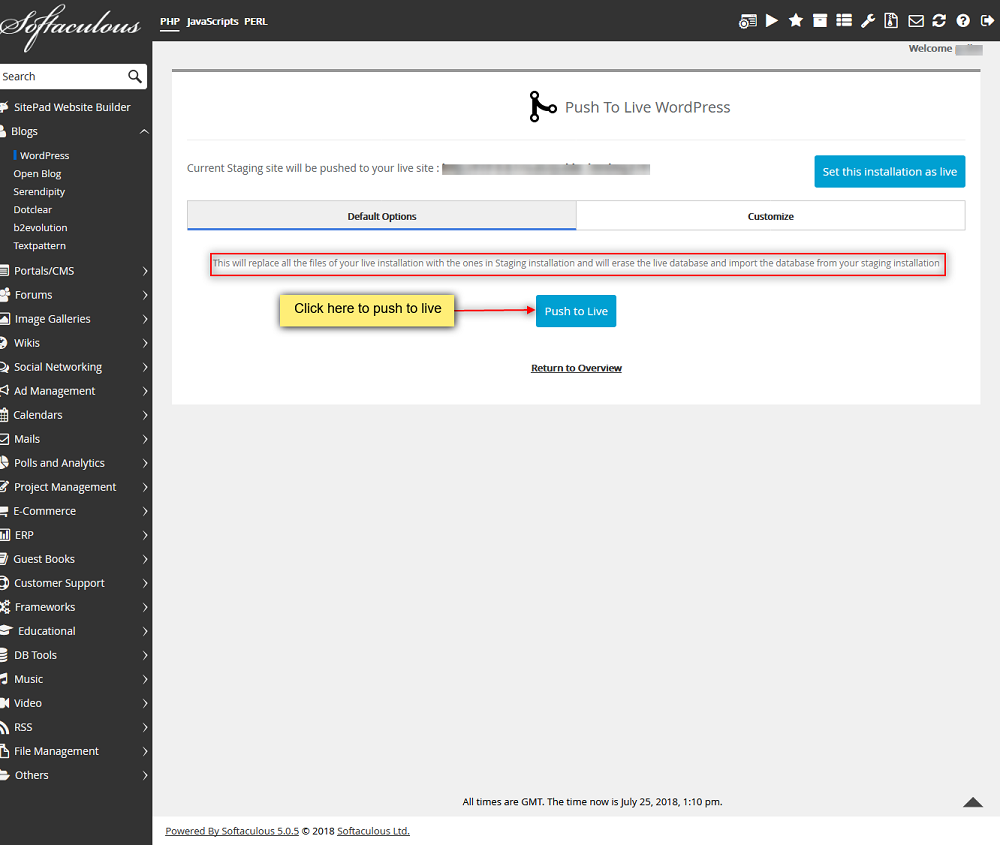
- Click on the Push to Live icon next to the corresponding staging application you wish to push to live:
- On the Push to Live page, choose Default Options or Customize:
- Default Push: The Default Options tab is selected by default. This option replaces all of the files of your existing live installation with the as-is files in the staging installation. Additionally, the existing live database is erased and the database from your staging installation is imported:
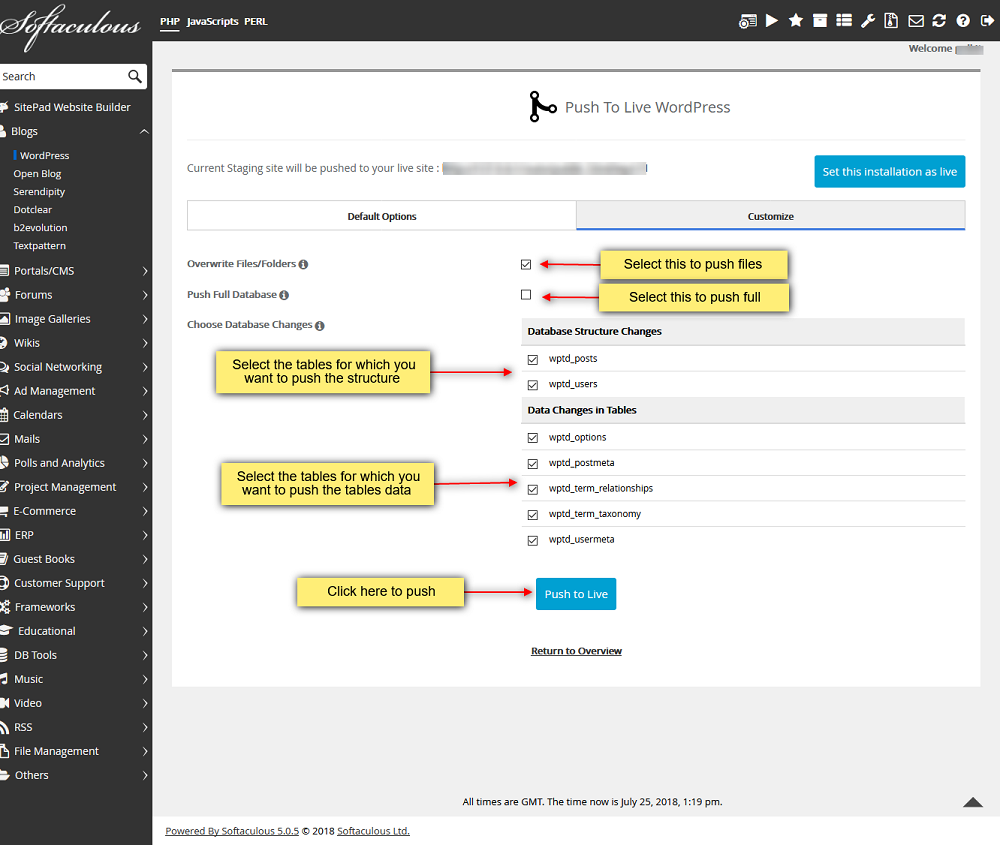
- Custom Push: To create a custom push, click the Customize On the Customize tab you can select to Push the Files, push Full Database changes (which includes structure changes as well as rows in the tables,) only push some of the Database Structure Changes, or push only Data Changes in Tables. This option is useful when you are working with a sample database, or if portions of the live site have been also been updated at the same time as the staging site:
- After making any desired customizations, click Push to Live. The time taken varies in accordance with the size of your installation, so please be patient.
- Once the changes have been successfully pushed to the live site, a Success” message will appear. It is then recommended that you peruse your live site to make sure everything is working as it should.
Having issues?
- If you're coming across issues staging with Softaculous, contact Listed Hosting customer support to submit a ticket and we would attend to you.