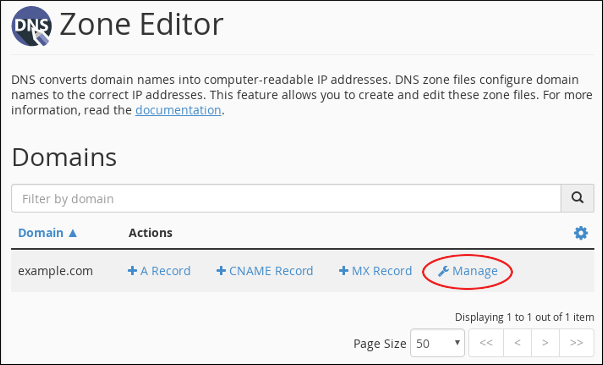
To configure DNS records for your domain, cPanel provides a Zone Editor. The Zone Editor enables you to quickly and easily change DNS records for your domain or domains.
How to add a record
Follow these steps;
- In the DOMAINS section of the cPanel home screen, click Zone Editor
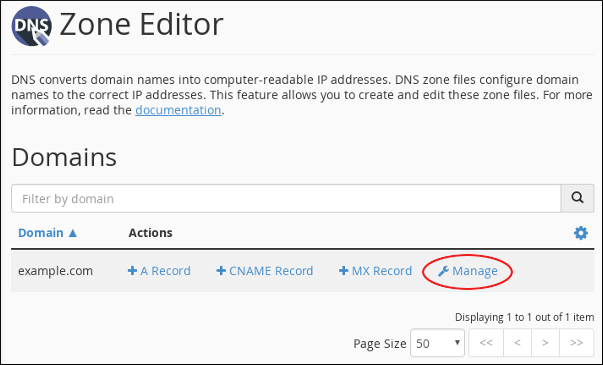
- Under Domains, locate the domain for which you want to add a record, and then click Manage
- Next to Add Record, click the down arrow, and then click the type of record you want to add
- In the Name text box, type the fully-qualified domain name (FQDN) for the record.
- In the TTL text box, type the time-to-live value in seconds.
- Confirm that the Type list box contains the type of record that you want to add.
- In the Record text box, type the value for the record.
- If you are adding an A record, type the IP address to associate with the domain name that you selected in step 2.
- If you are adding a CNAME record, type the associated canonical name for the domain name that you selected in step 2.
- If you are adding a TXT record, type the data for the TXT record.
- Click add record. cPanel adds the record.
To edit a record
Follow these steps;
1)In the DOMAINS section of the cPanel home screen, click Zone Editor
 2)Under Domains, locate the domain for which you want to add a record, and then click Manage

3)Locate the record you want to edit, and then under Actions, click Edit

4)Modify the value or values you want to change, and then click Save Record. cPanel updates the record.
To delete a record, follow these steps;
1)In the DOMAINS section of the cPanel home screen, click Zone Editor:

2)Under Domains, locate the domain for which you want to add a record, and then click Manage:

3)Locate the record you want to delete, and then under Actions, click Delete:

4)At the Confirm Deletion prompt, click Continue. cPanel deletes the record


